Potrzebne będą:
You're goning to need:
1. Dwa rodzaje materiału - jeden grubszy, drugi cienki na podszewkę,
1. Two types of fabric. One thicker, the other thiner for the lining,
2. Nić. Jeśli jeden z materiałów jest bardzo sztywny i gruby, nić musi być grubsza.
2. Matching thread. If one of the fabrics is a lot thicker or stiff, the thread must be thicker too.
Aby uzyskać wymiary wykroju mierzymy swój telefon. Dodajemy 5cm. do wymiaru szerokości i do podwójnej długości telefonu. Mój telefon ma wymiary 6x11,5cm, więc wykrój to prostokąt 11x28cm. Wycinamy taki prostokąt z obydwu materiałów.
To get a pattern dimentions, we have to measure our phone. We have to add 5cm to the width dimention and to double length of our phone. My phone is 6cm wide and 11,5cm long, so the pattern is a rectangle 11x28cm.
Składamy materiały twarzami do siebie.
Line the pieces face to face.
Zszywamy ze sobą krótsze boki ok. 1 cm od krawędzi.
Sew together two shorter sides about 1cm from the edge.
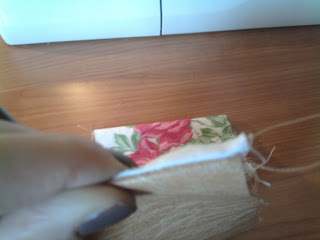
Wywijamy materiał i zaginamy krawędź. Jeśli jeden z materiałów jest o wiele grubszy niż drugi (tak jak u mnie), trudno będzie utrzymać zagięcie na krawędzi, dlatego trzeba przeszyć jeszcze raz wzdłuż tego zagięcia jak najbliżej krawędzi. Jeśli materiał się poddaje, nie ma takiej potrzeby.
Turn the fabric and bend the edge. If one of the fabric is a lot thicker than the other (just like in my case), it's going to be difficult to keep the edge bent, that's why we need to sew again along the edge, as close to it as possible. If there's no need for it, you can leave the edge without a second seam.
Następnie składamy pasek podszewką do siebie, wyrównujemy krótsze krawędzie ze sobą i zszywamy wzdłuż dłuższych boków, ok 1cm od krawędzi.
Next bend the stripe lining together, line shorter edges together and sew along longer sides, about 1cm from the edge,
Przycinamy blisko szwów, uważając, żeby go nie przeciąć i wywracamy całość na drugą stronę.
Trim close along the seams. Be careful not to cut through the seam. Turn the whole thing inside out.
Następnie przeszywamy wzdłuż tych samych krawędzi co poprzednio 0,5cm od krawędzi.
Sew along the same edges as above about 0,5cm from the edge.
Obcinamy nitki, wywijamy na prawą stronę i GOTOWE:)
Trim the threads, turn inside in and DONE:)


Looks easy to make!
OdpowiedzUsuńactually it's the easiest project so far...;)
OdpowiedzUsuńLovely simple tutorial! Great work!
OdpowiedzUsuńThanks for linking to a Round Tuit!
Hope you have a great week!
Jill @ Creating my way to Success
http://www.jembellish.blogspot.com/
Ten komentarz został usunięty przez autora.
OdpowiedzUsuńFajny pomysł, można też w sumie kupić gotowe etui na https://etuistudio.pl
OdpowiedzUsuń